
From 2D dieline to 3D preview: how a flat sheet becomes a box
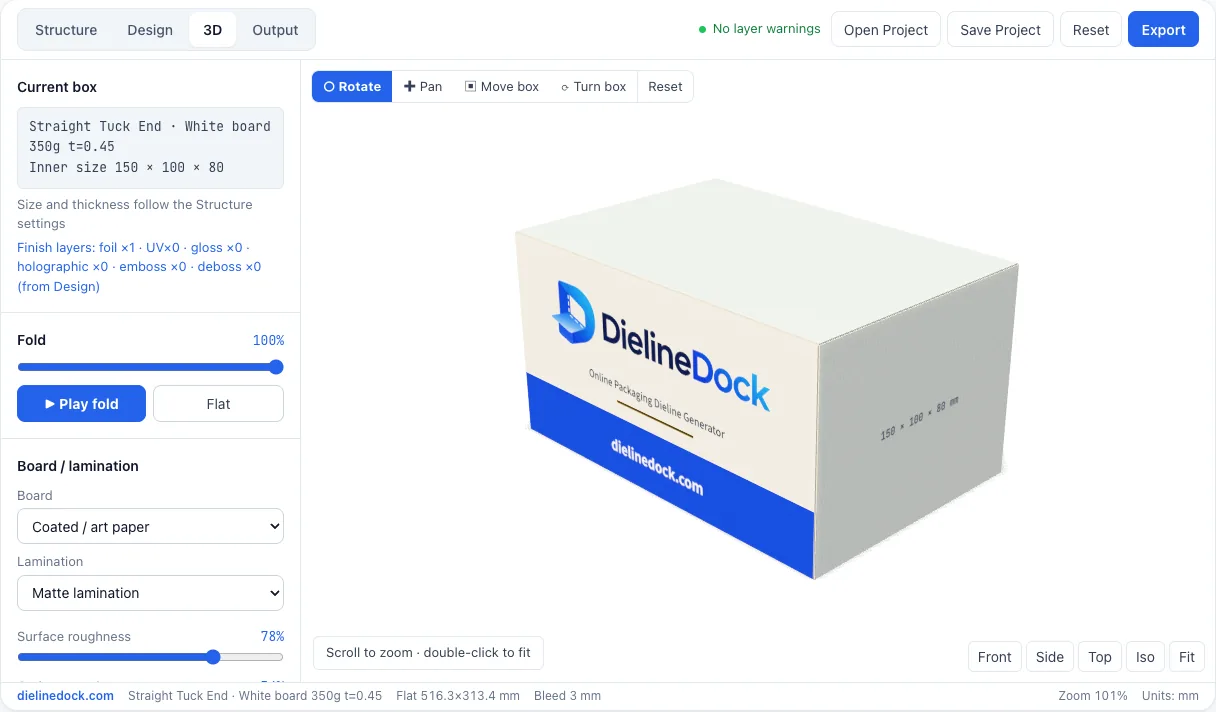
A dieline is easier to understand once you see it fold. DielineDock includes a 3D workspace where you can fold the box, turn it around and try different board and finish looks. This guide explains how folding works, how to use the 3D tools and why the preview is illustrative rather than exact.
- Fold control
- Fold slider and Play fold
- Views
- Front, side, top and iso
- Laminations
- None, matte, gloss, soft-touch
- Accuracy
- Illustrative, from nominal L × W × H
Who this guide is for
This guide is for anyone who finds it hard to picture a box from a flat drawing, and for anyone who needs to show a design to a client or team before a sample exists. In 2D it is easy to put artwork upside down on a lid, on the wrong side panel or on a flap that ends up hidden.
Core concepts
Folding follows the crease lines. On a Straight Tuck End, the four body panels wrap into a tube and the glue flap is glued to the far panel. Dust flaps fold in, the lid closes and its tuck tongue slides inside. On a Reverse Tuck End, the top lid hinges from the back panel and the bottom lid from the front, so the lids open from opposite faces. A Mailer Box folds up from one piece: the walls rise, the side ears fold in and the hinged lid closes with a tuck flap.
Orientation changes when you fold. Artwork on a lid or bottom panel may need rotating so it reads correctly when the box stands upright. The 3D view is the quickest way to catch this.
The 3D model is illustrative. It is built from the same nominal L, W and H as the dieline, but not from the exact dieline geometry, and flap shapes are approximated. It is useful for layout, orientation and overall look, not for measurement.
Practical steps in DielineDock
- 1Set up the box in Structure. A small live 3D preview updates next to the dieline as you change sizes.
- 2Add artwork in Design, then open the 3D workspace.
- 3Drag the fold slider or press Play fold to watch the box move from flat to closed.
- 4Use the front, side, top and iso views, or rotate, pan, move and turn the box. Double-click to fit it on screen.
- 5Try board presets such as coated white, natural kraft, black or silver board, with matte, gloss or soft-touch lamination.
- 6Preview the finishes set in Design, such as foil, spot UV, gloss, emboss, deboss and holographic. Inspect modes show each finish plate, emboss height and a 20 mm UV checker.
- 7Pick a studio lighting preset and a perspective or orthographic camera, then take screenshots for review.
Common mistakes
- Using the 3D view to confirm exact fit instead of the Details panel and a sample.
- Judging final colour from the screen.
- Assuming a foil or holographic preview shows exactly how the real finish will look.
- Checking only the front and forgetting the bottom, lids and flaps.
- Skipping the physical sample because the 3D looks right.
Always make a physical sample
A printed and folded sample is the only reliable check of fit, folding behaviour, board feel and colour. Even a plain hand-cut mock-up based on the Details panel measurements can reveal a tight lid or artwork on the wrong face. Use the 3D preview to get close, then let a sample and your printer confirm.
Frequently asked questions
Is the 3D preview exact?
No. It is illustrative, built from the nominal dimensions with approximated flap shapes. Use it for layout and presentation, and rely on the dieline, the Details panel and a physical sample for measurements.
Do the finish previews match real foil or spot UV?
They are visual approximations that show where a finish is placed. Real results depend on the material, the finishing process and the supplier, so ask for a sample.
Why does my artwork look rotated in 3D?
Lids and bottom panels face a different direction once folded. If text reads upside down in 3D, rotate that layer in Design and check again.
How can I share the 3D view?
Take screenshots of the 3D workspace. To share the editable design on Starter or Pro, save a .boxproj file that anyone can open in DielineDock.