
Lid & Base Box
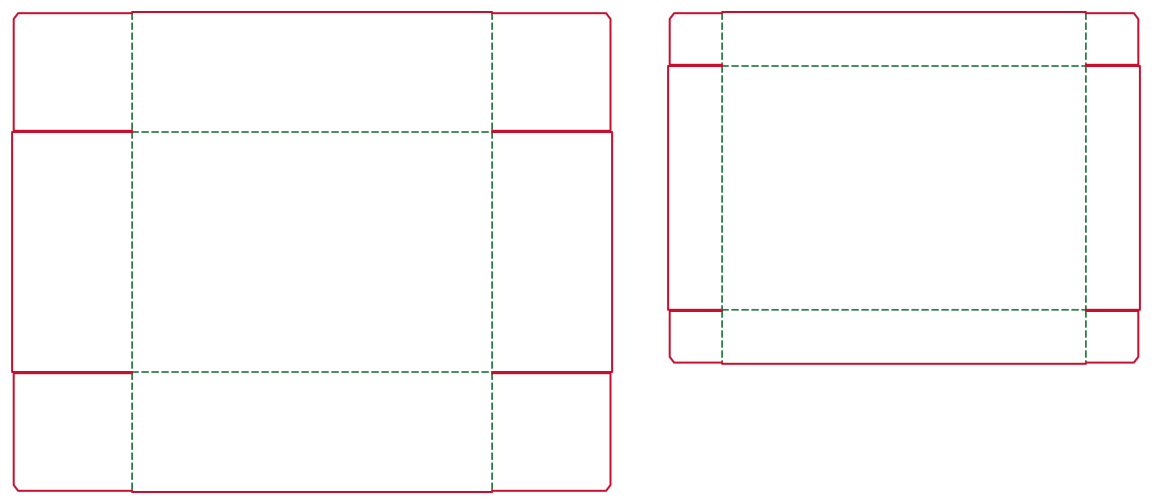
The lid and base box is a two-piece set: an open tray for the product and a separate lid that lowers over it. DielineDock sizes the lid from the base.
- Pieces
- Two: base and lid tray
- Lid allowance
- Base + 2t + 1 mm per side
- Best for
- Gift and presentation boxes
- Default size
- Set your own
What a lid and base box is
A lid and base box is made of two trays: the base holds the product and the lid slides down over it. Lifting the lid off is a slower, more deliberate opening than a tuck flap.
How the structure is built
DielineDock produces two pieces. The base tray has walls equal to the inner height H. The lid tray is larger and shallower: its inner size is the base plus 2t plus 1 mm per side, so it clears the base walls, and its wall height is the larger of 14 mm and 0.45 × H.
Products it suits
Gifts where presentation matters: scarves, chocolates, candles, jewellery sets and premium kits. The shallow lid leaves part of the base visible for a contrasting colour.
Strengths and limitations
Strengths: an elegant opening, a lid top that works as one strong print face, and a base that doubles as a display tray. Limitations: two dielines to print, cut and assemble, and more board than a one-piece carton. The lid is held by fit alone, which depends on the real board, so prototype before ordering.
Dimension notes
Enter the inner size of the base. Base walls equal H, and the lid is calculated with 2t plus the 1 mm per side allowance. Lid wall height scales with the box: at H = 60 mm it is 27 mm (0.45 × 60), while at H = 25 mm it stays at the 14 mm minimum. Thicker board enlarges the lid slightly to clear the thicker base walls.
Suitable materials
White board 400g gives firm walls for most gift boxes; white board 350g or coated paper 300g suit smaller sets, and kraft board 350g gives a natural look. F-flute micro corrugated adds stiffness for heavier contents.
How to create it in DielineDock
- 1Open the editor and choose Lid & Base.
- 2Enter the inner length, width and height of the base.
- 3Select your board; the lid resizes from its thickness.
- 4Check the bleed recommended for that material.
- 5Review both pieces on the canvas and in the Details panel.
- 6Design the lid top and the visible base walls.
How to preview and export
The 3D workspace shows the pair folded so you can judge lid coverage; it is illustrative, so test real fit on a sample. To export, open the Output workspace and press Export; Free includes one watermarked RGB Review PDF. On Starter or Pro, you can also save a .boxproj file.
Frequently asked questions
Do I enter the lid size or the base size?
The base. DielineDock calculates the lid from it, adding 2t plus 1 mm per side so it fits over the base walls.
How tall is the lid wall?
The larger of 14 mm and 0.45 × H. Short boxes get a 14 mm lid wall; taller boxes get a deeper lid.
Can I type in my own lid depth?
In DielineDock the lid wall height is calculated from the rule above. If you need a different depth, discuss it with your printer.
Will the lid fit exactly?
The allowance is a starting point. Real fit depends on board, coating and manufacturing, so always check a physical sample.